
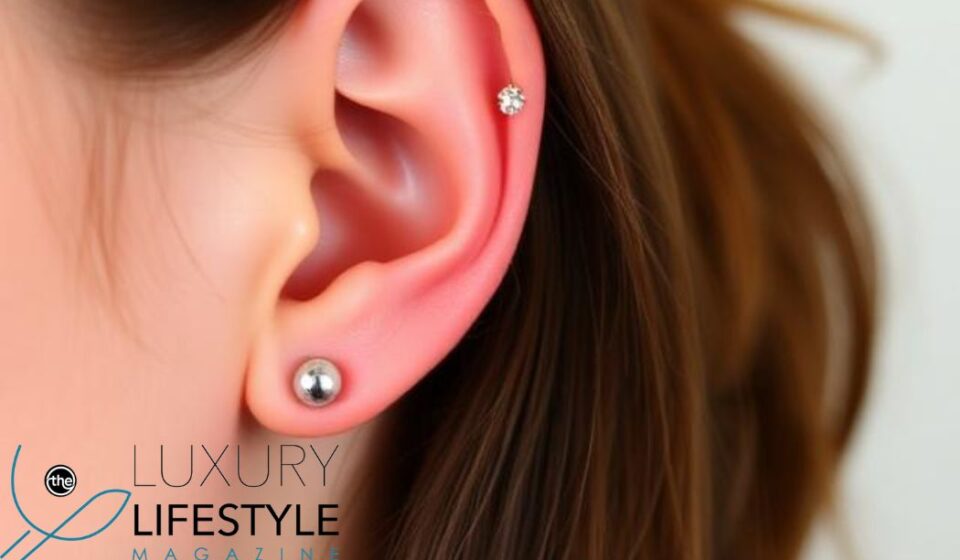
Do you remember the thrill of getting your first lobe piercing? That small act of self-expression that felt so significant. Today, ear piercings have evolved from a simple stud in the lobe to a sophisticated art form. A single ear has become a canvas for personal storytelling, a curated gallery of tiny treasures that reflect your unique style. But with so many options—from the subtle to the statement-making—where do you even begin?
This is where an ear piercing chart becomes your most valuable tool. An ear piercing chart isn’t just a diagram; it’s your roadmap to creating a look that is both beautiful and anatomically sound. It helps you understand the language of piercers and plan a journey that respects your body’s healing process. Whether you’re a piercing novice or a seasoned enthusiast looking for your next addition, this guide will walk you through the entire map of your ear.
Understanding the Ear Piercing Chart
What Exactly is an Ear Piercing Chart?
An ear piercing chart is a detailed map of the ear that identifies all the possible locations for piercings, along with their names and characteristics. Think of it as a visual dictionary for the auricle (the visible part of your ear). It breaks down the ear into specific zones: the fleshy lobe, the various ridges and folds of cartilage, and the inner cup-like areas. By using a chart, you can move from vague ideas like “I want a cartilage piercing” to precise concepts like “I want a double forward helix and a conch stud.”
Using a chart ensures you and your piercer are speaking the same language. It allows you to visualize how different piercings will work together and helps you understand which placements are best suited to your unique ear anatomy.
Why You Need a Chart Before Your Appointment
Venturing into a piercing studio without a plan can be overwhelming. A professional piercer will offer expert advice, but having your own ideas mapped out makes the consultation far more productive. A chart allows you to:
-
Plan a “curated ear”: This is a carefully designed arrangement of piercings that complement each other and your ear’s shape. Some studios, like SARAH & SEBASTIAN, even offer dedicated “Ear Alchemy” appointments where they use a chart to map out your unique design.
-
Understand the commitment: A chart provides immediate context for healing times, which vary wildly between a lobe piercing (6-8 weeks) and a cartilage piercing (often 6-12 months).
-
Communicate clearly: When you can point to a chart and say, “I’d like a rook and a flat piercing here,” there’s no ambiguity.
Exploring Every Type of Ear Piercing
Let’s take a detailed tour of the ear, from the most common to the more adventurous, using our ear piercing chart as our guide.
The Lobe Family: The Classic Foundation
This is the soft, fleshy lower part of the ear. It’s the most popular starting point and is blessed with good blood flow, making it the quickest and least painful to heal.
-
Standard Lobe Piercing: The classic, often the first piercing. It’s placed in the center of the earlobe. Healing time is typically 6-8 weeks.
-
Upper Lobe / Stacked Lobe: This piercing sits just above the standard lobe but still on the fleshy part. It’s perfect for creating a stacked or “diminishing” effect, allowing you to wear multiple studs in a row along the lobe.
The Helix Family: The Outer Rim
This region covers the outer rim of cartilage that runs along the top and side of the ear. These are incredibly popular and versatile but require more patience for healing.
-
Helix Piercing: Located anywhere along the upper outer cartilage rim, from the curve at the top down to just above the lobe. It’s often the first cartilage piercing people choose and can be worn with a stud or small hoop.
-
Forward Helix Piercing: Found on the front of the ear, where the helix meets your face, directly opposite the standard helix and above the tragus. It’s a delicate area often done in multiples to create a stylish cluster.
-
Flat Piercing: This is found on the smooth, “flat” area of cartilage between the helix rim and the rook. It’s an excellent canvas for a statement stud or unique jewelry piece.
The Inner Ear: The Bold Statement
This is where things get interesting. The inner ear features more complex folds and thicker cartilage, offering placements that are unique and visually striking.
-
Tragus Piercing: This goes through the small, thick piece of cartilage that partially covers your ear canal. It’s a popular spot for tiny studs or small hoops.
-
Daith Piercing: Located in the innermost cartilage fold, right above the ear canal. It’s a very popular spot for a hoop or a heart-shaped ring. Interestingly, some people believe it may help alleviate migraine pain, though this hasn’t been scientifically proven.
-
Rook Piercing: This vertical piercing goes through the ridge of cartilage between the inner and outer conch, above the daith. It’s often done with a curved barbell. This is generally considered a more painful piercing due to the thick cartilage.
-
Conch Piercing: The conch is the large, cup-shaped central area of the ear. An inner conch piercing is worn with a stud, while an outer conch (closer to the rim) is a prime spot for a hoop. The area is a great blank canvas for a bold centerpiece.
The Edge: Advanced & Edgy
These piercings are for those looking to make a real statement. They can be more complex to heal and are often dependent on your individual ear anatomy.
-
Industrial Piercing: A “scaffolding” piercing that consists of two holes in the upper cartilage (typically one in the helix and one in the forward helix) connected by a single, straight barbell. It requires careful aftercare and is one of the more challenging piercings to heal.
-
Snug Piercing: This horizontal piercing sits on the inner ridge of cartilage, between the helix and the conch. Not all ears have the right anatomy for this, but for those who do, it’s a unique and striking look.
-
Anti-Tragus Piercing: Located opposite the tragus, this is the small ridge of cartilage above your earlobe. It’s a less common but very personal choice.
-
Orbital Piercing: This is when one piece of jewelry (usually a hoop) is worn through two separate piercings, often on the lobe or the auricle area.
Your Ear Piercing Chart at a Glance
| Placement | Healing Time (approx.) | Pain Level (subjective) | Jewelry Starter |
|---|---|---|---|
| Lobe | 6-8 weeks | Low (1/5) | Stud, Small Hoop |
| Upper Lobe | 6-8 weeks | Low-Medium | Stud, Small Hoop |
| Helix | 6-10 months | Medium (3/5) | Flat-back Stud |
| Forward Helix | 6-12 months | Medium-High (4/5) | Flat-back Stud |
| Flat | 6-10 months | Medium | Flat-back Stud |
| Tragus | 6-12 months | Medium (3/5) | Flat-back Stud |
| Daith | 6-12 months | Medium-High (4/5) | Hoop |
| Rook | 6-12 months | High (5/5) | Curved Barbell |
| Conch | 6-12 months | Medium (2/5) | Flat-back Stud |
| Snug | 8-12 months | High | Curved Barbell |
| Industrial | 9-12 months | High (5/5) | Straight Barbell |
| Anti-Tragus | 6-12 months | High | Curved/Straight Barbell |
Practical Tips for Your Piercing Journey
-
Consult a Professional: Your anatomy is unique. Not every piercing is possible for every ear, and a professional piercer will know what will work best for you.
-
Use a Needle, Not a Gun: Cartilage piercings should always be done with a sterile, hollow needle. Piercing guns can cause trauma and shatter cartilage.
-
Choose High-Quality Jewelry: Implant-grade titanium, 14k-18k gold, and surgical steel are ideal for healing and minimizing allergic reactions.
-
Prioritize Aftercare: Clean your piercing twice a day with a sterile saline solution. Do not use alcohol or hydrogen peroxide, as they can irritate the piercing.
-
Be Patient: Cartilage piercings can take a year or more to fully heal. Be consistent with your aftercare and avoid changing your jewelry prematurely.
Common Mistakes and How to Avoid Them
-
Mistake: Sleeping on a fresh piercing.
-
Solution: Use a travel pillow to keep pressure off the healing ear.
-
-
Mistake: Using headphones or earbuds too soon.
-
Solution: Avoid in-ear headphones for tragus, daith, or conch piercings until they are healed to prevent irritation and infection.
-
-
Mistake: Touching the piercing with dirty hands.
-
Solution: Always wash your hands thoroughly before touching or cleaning your new piercing.
-
-
Mistake: Changing jewelry too early.
-
Solution: Wait for your piercer to give you the “all-clear.” Changing jewelry before the piercing is healed can cause trauma and set your healing back.
-
The Future of Ear Piercing: Curated and Personal
The trend in 2026 is moving away from random piercings and toward highly personalized, curated ears. This involves a lot of planning, often using an ear piercing chart as a starting point. Piercers are playing with asymmetrical designs, mixing and matching metals and stones, and creating unique constellations of studs and hoops. The focus is on a look that feels intentional and harmonious, a true reflection of the wearer’s personality.
Key Takeaways
-
An ear piercing chart is your essential guide to understanding the anatomy of the ear and planning your perfect look.
-
Healing times vary dramatically; lobe piercings heal in weeks, while cartilage piercings can take up to a year.
-
Always consult a professional piercer who uses a sterile needle and high-quality jewelry.
-
Aftercare is crucial for preventing infection and ensuring a smooth healing process.
-
The latest trend is the “curated ear” – a carefully designed collection of piercings that complement each other and your anatomy.
Frequently Asked Questions (FAQs)
1. What is the least painful ear piercing?
The lobe piercing is generally considered the least painful due to its soft, fleshy tissue.
2. What is the most painful ear piercing?
Piercings through thick cartilage like the rook and industrial are often cited as being among the most painful.
3. What is the healing time for a cartilage piercing?
Cartilage piercings typically take 6 to 12 months or more to fully heal, depending on the exact location and your aftercare.
4. Can I use a piercing gun for a cartilage piercing?
No. Professional piercers strongly advise against using a gun on cartilage, as it can cause trauma and shatter the cartilage. A sterile hollow needle is the only safe method.
5. What is an “Ear Alchemy” or “Curated Ear” appointment?
This is a service offered by many piercing studios where a piercer will examine your ear anatomy and help you design a custom arrangement of piercings and jewelry that perfectly suits your style and structure.
6. Do daith piercings really help with migraines?
Some people have reported an improvement in migraines after getting a daith piercing, but this is based on anecdotal evidence and acupuncture theories. There is no formal scientific proof.
7. How much do ear piercings cost?
Costs vary, but you can expect to pay between $20-$70 for a lobe piercing and $30-$100 or more for a cartilage piercing.
8. What gauge are ear piercings?
Lobe piercings are typically done at 20G-18G, while cartilage piercings are usually 18G-14G.
Sources:
-
Harper’s Bazaar Australia: “Everything you need to know about ear piercing”
-
Spencer’s: “Ear Piercings: The Complete Guide”
-
Lark & Berry: “Ear Piercing Placements & Healing Time Chart”
-
Grazia Daily UK: “Ear Piercings: How To Decide What Hole Works For You – And How Much They’ll Hurt”
-
SkinKandy: “Ear Piercing Placements Guide”
-
Ear Piercing Chart Website: “Ear piercing chart: Ear piercing meaning and overview”
-
ELLE Australia: “A Guide To Every Type Of Ear Piercing”
FOR FURTHER INFORMATION, VISIT: THELUXURYLIFEMAGAZINE.COM