
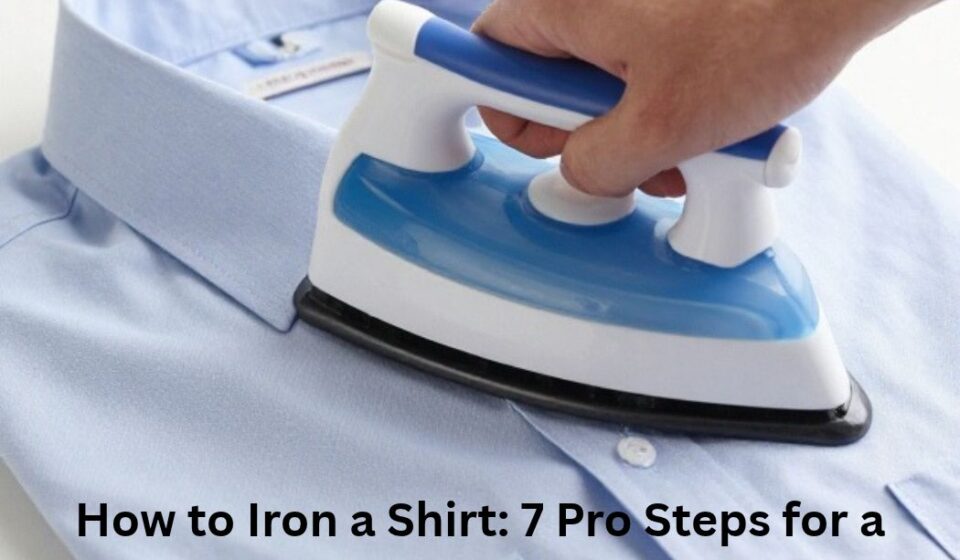
How to Iron a Shirt: You’ve got an important meeting in twenty minutes. You pull your best dress shirt from the closet, only to find a constellation of creases across the front panel and a collar that looks like it’s been through a tumble dryer fight. You plug in the iron, crank the dial to “Cotton,” and press. Ten minutes later, you’re wearing a shirt that is technically less wrinkled, but the collar has a weird shine, the sleeves have a sharp crease down the middle you didn’t intend, and there’s a faint scorch mark near the placket. Sound familiar?
Here’s the uncomfortable truth: most people were never taught how to iron a shirt properly. We were taught to press fabric, not to shape a garment. And in 2026, with the rise of high-performance steam stations and “wrinkle-resistant” fabrics, the gap between a rushed job and a professional finish has never been more visible—or more avoidable.
This guide is not just a list of steps. It’s a framework. We’ll look at the physics of fabric relaxation, the psychology of why we iron in the wrong order, and the specific techniques that separate a shirt that looks “pressed” from one that looks tailored. Whether you’re a beginner who dreads the board or a professional who wants to shave minutes off a Sunday night routine, this is how to iron a shirt in 2026.
Background: Why Ironing Is a Lost Art (and Why It Matters More Than Ever)
For centuries, ironing was a laborious, often dangerous chore involving heavy metal flatirons heated over open flames. The electric iron, patented in 1882, and the subsequent invention of the steam iron in the 1920s, transformed the task from a household hazard into a manageable domestic duty. But somewhere between the rise of permanent-press fabrics in the 1960s and the modern preference for “athleisure,” the collective knowledge of how to iron well began to fade.
Yet, the demand for a crisp shirt hasn’t disappeared. In fact, in an era of remote work and casual Fridays, the visual signal of a well-ironed dress shirt has become a power move. It signals attention to detail, self-respect, and a certain level of competence before you’ve even spoken a word. The problem is that most modern shirts—especially those made from 100% cotton or linen—are designed to wrinkle. They are natural fibers that react to water, heat, and pressure. You cannot simply wish the wrinkles away; you must understand how the fibers behave.
Furthermore, the equipment has evolved. The 2026 market offers everything from compact handheld garment steamers to professional-grade ironing systems with active suction boards. Buying the right tool is only half the battle. Knowing how to use the tool on the right part of the shirt at the right time is what separates a frustrating chore from a satisfying ritual.
The Anatomy of a Shirt: Why Order Matters
Most people iron a shirt by starting with the big, flat back panel. It feels efficient. It is also the biggest mistake you can make.
Think of ironing as a sequence of operations. You want to work from the smallest, most detailed, and most heat-sensitive areas to the largest, flattest panels. Why? Because once you iron the large body of the shirt, any subsequent handling—rotating the shirt on the board, reaching for the collar, flipping it over—will re-crease the fabric you just smoothed. By starting with the collar and cuffs, you get the “fiddly” bits out of the way while the shirt is still relatively flat and manageable. You finish with the front panels, which are the most visible part of the garment, ensuring they are the last thing to be pressed and the first thing to look immaculate.
The Correct Sequence: Collar → Cuffs → Sleeves → Yoke → Back → Front
This is not arbitrary. The collar and cuffs are double-layered and often interfaced (fused with a stiffening material). They require the most direct heat and pressure to lie flat. The sleeves involve a tube of fabric, which requires careful alignment. The body panels are large and forgiving. By moving from small to large, you preserve the crispness of the details while ensuring the main canvas is flawless.
The Step-by-Step Method (The Professional Standard)
Step 1: The Collar (The Detail That Defines the Shirt)
The collar is the first thing people see when they look at you. It is also the hardest part to get right.
The Technique:
Do not iron the collar while it is folded. Unfold it completely. Start with the underside (the side that touches your neck). Iron from the points inward toward the center. If you iron from the center outward, you push slack fabric toward the tips, which creates a small, impossible-to-remove pucker. Turn the collar over and repeat on the outside.
The Pro Insight:
Leave the fold (where the collar turns down) unpressed or only lightly steamed. A hard, sharp crease at the collar roll looks cheap and rigid. You want a natural, soft roll that curves around the neck. If you have removable collar stays, take them out before ironing; they can leave imprints or warp under heat.
Step 2: The Cuffs (The Second Most Noticed Zone)
Unbutton the cuffs and open them flat. Iron the inside first, then flip and do the outside. Use the tip of the iron to work around the buttons, never directly over them. Pressing over a button can crack it or leave a permanent, shiny outline in the fabric. If you have French cuffs, iron them completely flat and unfolded, then fold them back and press only the very edge of the fold lightly.
Step 3: The Sleeves (The Alignment Game)
This is where most people fail. The trick is to lay the sleeve on the board with the underarm seam running perfectly along the bottom edge. Smooth both layers of fabric flat with your hand before the iron touches it. A misplaced crease here is nearly impossible to undo.
Iron from the shoulder down to the cuff in long, steady strokes. Turn it over and repeat.
The Crease Debate:
Should you iron a sharp crease down the front of the sleeve? Traditionally, yes, for military or formal business shirts. For most modern shirts, a sharp crease looks dated and can damage the fabric over time. If you want a crease-free sleeve, slide a sleeve board (or a tightly rolled towel) inside the sleeve so you are ironing a rounded surface rather than a flattened fold.
Step 4: The Yoke and Shoulders (The Forgotten Zone)
The yoke is the panel across the upper back and shoulders. It is often a double layer of fabric, meaning it needs more steam and pressure. Drape one shoulder over the narrow end of the ironing board so the curve of the board fills the curve of the shirt. Press across, then reposition for the other side. This is what gives a shirt that “tailored” look from behind.
Step 5: The Back and Front Panels (The Finale)
Start with the button-side front panel. Iron the button band from the reverse side if possible, or work carefully between the buttons with the tip of the iron. Then slide the shirt around the board to do the back, keeping any center pleat perfectly aligned. Finish with the buttonhole front panel. This is the most visible part of the shirt when worn, so doing it last ensures nothing gets dragged back across it.
Immediate Hang:
Do not fold the shirt over a chair. Hang it immediately on a hanger. Fasten the top button and one in the middle to keep the placket straight. Let it cool completely before wearing. Warm fibers take on new creases easily.
The Temperature Playbook: Fabric-by-Fabric
You cannot iron a linen shirt on the same setting as a polyester blend without risking a disaster. The care label is your ceiling, not your guide.
| Fabric | Heat Setting | Steam | Crucial Tip |
|---|---|---|---|
| Cotton | High (3 dots) | Heavy | Best ironed slightly damp for a crisp finish. |
| Linen | Highest | Heavy | Must be damp or steam is essential; creases will not release otherwise. |
| Polyester/Blends | Low/Medium (1-2 dots) | Minimal | Iron on the reverse side to avoid shiny marks. Set iron to the lowest-heat fiber. |
| Silk | Low | Dry or Light | Always use a pressing cloth between the iron and the fabric. |
| Wool | Medium | Steam | Use a pressing cloth and light pressure; excessive heat flattens the hand of the cloth. |
Data synthesized from industry care guides.
The Dampness Rule:
Cotton and linen fibers relax dramatically when they contain moisture. If your shirt is bone-dry, you are fighting the fabric. The ideal state is “slightly damp”—either iron it straight off the line before it’s fully dry, or use the steam burst function generously.
Common Mistakes (and How to Fix Them)
Mistake 1: Ironing a Dirty Shirt
Heat sets stains. A faint ring of deodorant or a splash of coffee will become permanent if you press it with a hot iron. Always ensure the shirt is clean before ironing.
Mistake 2: The Shiny Soleplate
A dirty soleplate (with starch residue or mineral buildup) will transfer a brown or shiny film onto a white shirt. Wipe the soleplate with a damp cloth or a dedicated iron cleaner before you start.
Mistake 3: Pressing Over Buttons and Zippers
This cracks buttons and scratches the soleplate. Use the tip of the iron to navigate around them.
Mistake 4: The “Ironing” Motion on Delicates
For delicate fabrics or printed shirts, do not slide the iron. Press: lower the iron, hold, lift, and move. Sliding stretches the fabric and can distort the weave.
Mistake 5: Forgetting the Collar Stays
Plastic collar stays can melt or warp under high heat, ruining the shirt and the iron. Always remove them first.
Pros, Cons, and the Equipment Reality (2026)
The Traditional Steam Iron
Pros: Compact, affordable, doubles as a steamer for hanging garments, easy to store.
Cons: Small water tank requires refilling for multiple shirts; the weight of the water in the handle can fatigue the wrist.
The Steam Generator / Ironing System
Pros: Continuous high-pressure steam, massive water tanks, lightweight iron (the boiler sits on the floor). Ideal for ironing multiple shirts quickly or heavy fabrics like linen.
Cons: Expensive, takes up significant space, not portable. Overkill for a single shirt a week.
The Garment Steamer
Pros: Fast, safe for almost all fabrics, excellent for refreshing a shirt between wears or for delicate prints.
Cons: It cannot press a sharp collar or cuff. It relaxes wrinkles but does not create a crisp, flat finish.
Balanced Analysis:
If you wear a dress shirt daily, a steam generator is a worthwhile investment that will cut your ironing time in half. If you iron occasionally, a quality steam iron with a good soleplate and a burst-of-steam function is all you need. A garment steamer is a supplement, not a replacement, for the collar and cuffs.
Future Trends: Where Shirt Care Is Heading in 2026 and Beyond
1. The “Smart” Iron and Fabric Sensing
We are seeing early iterations of irons with sensors that detect fabric type and automatically adjust temperature and steam output. While not yet flawless, the trend is toward removing the guesswork from the temperature dial. In the next few years, expect more appliances that communicate with your shirt’s care label via NFC or QR codes.
2. The Rise of the “At-Home Dry Cleaner” Finish
Consumer demand for professional results at home is driving innovation in soleplate coatings and steam pressure. The gap between a domestic iron and a commercial press is narrowing, particularly with the proliferation of affordable steam stations.
3. Sustainable Care and “Wash Less, Steam More”
As sustainability concerns grow, there is a shift toward refreshing garments with steam rather than washing them after every wear. This preserves the fabric (less agitation in the wash) and saves water. The garment steamer is transitioning from a luxury gadget to a core laundry tool.
4. The “No-Iron” Paradox
Despite the marketing of wrinkle-resistant shirts, the demand for 100% natural fiber shirts (cotton, linen) is actually rising among professionals who prioritize breathability and hand-feel. This means the skill of ironing is becoming more valuable, not less, because the people who wear these shirts need to know how to care for them.
Key Takeaways (Quick Summary Box)
-
Prep is Everything: Read the care label, remove collar stays, unbutton everything, and ensure the shirt is slightly damp (or use steam).
-
Order is Critical: Iron the Collar → Cuffs → Sleeves → Yoke → Back → Front Panels.
-
The Collar Rule: Iron from the points inward to avoid puckering. Do not press a hard crease into the fold.
-
The Sleeve Alignment: Match the underarm seam to the board edge and smooth by hand before applying heat.
-
Temperature Caution: For blends, always set the iron to the lowest heat-sensitive fiber. Use a pressing cloth for dark or delicate fabrics.
-
Finish Strong: Hang immediately, button the top and middle buttons, and let it cool before wearing.
Detailed FAQs About How to Iron a Shirt
Q: Can I iron a shirt without an ironing board?
A: Yes. A thick towel laid on a sturdy table works in a pinch. Ensure the surface underneath can handle the heat. However, a proper board with a narrow end is essential for the shoulders and sleeves.
Q: How do I iron a shirt without an iron?
A: For light creases, hang the shirt in a steamy bathroom (from a hot shower) or use a garment steamer. You can also toss the shirt in a tumble dryer with a damp towel or ice cube on low heat for 10 minutes, then hang immediately.
Q: Should I use spray starch?
A: It is entirely optional. Starch adds crispness and helps resist future wrinkles, but it can also build up on the fabric over time, making it stiff and attracting dirt. It is best reserved for the collar and cuffs of formal shirts.
Q: Why did my white shirt turn shiny after ironing?
A: Shine is usually caused by ironing on the right side of a dark or synthetic fabric with too much heat and pressure. The heat flattens the fibers and makes them reflect light. Always iron synthetics and dark colors on the reverse side or use a pressing cloth.
Q: How do I iron a shirt with a print or embroidery?
A: Turn the shirt inside out and iron the reverse side. If you must iron the front, place a thin cotton tea towel or pressing cloth between the iron and the print. Avoid sliding the iron; use a pressing motion.
Q: What is the best way to store an ironed shirt?
A: Hang it on a wide-shouldered wooden or plastic hanger (not wire) immediately after ironing. Fasten the top button to keep the collar shape. Avoid cramming it into a packed closet; give it breathing room to prevent new creases.
Sources and Further Reading
The techniques and insights in this guide are synthesized from the following authoritative sources:
-
Laurastar (Australia): How to Iron a Shirt Perfectly: A Step-by-Step Guide (2026). Provides the definitive sequence and collar/sleeve techniques.
-
TOG24: Essential Ironing Guide (2025). Practical fabric temperature breakdown and equipment prep.
-
Suitsupply: How to Take Care of Your Shirts (2026). Guidance on drying, dampness, and hanger selection.
-
Claudio Lugli Shirts: How to Iron a Shirt: Collar, Cuffs, Sleeves & Body (2026). Insights on printed shirts and reverse-side ironing.
-
National MagLab: Smoothing Iron – 1882. Historical context on the evolution of ironing technology.
-
Coolblue: Advice on Irons (2025). Comparative analysis of steam irons vs. steam generators vs. systems.
-
LaundroMaps: How to Iron a Shirt (2026). Distinction between “ironing” (sliding) and “pressing” (lifting).
-
Dandylion Style: How to Iron a Shirt Without an Iron (2026). Alternative methods and the risks of high heat on no-iron shirts.
FOR FURTHER INFORMATION, VISIT: THELUXURYLIFEMAGAZINE.COM